Easy Recipe for Making Yogurt From Scratch
How to Make Homemade Yogurt
Homemade yogurt is easy to make and I'll walk you through the process step-by-step (with a video). This is a fail-safe way to make yogurt at home – promise!

If you've never made homemade yogurt before because you thought it was too difficult, I'm here to tell you that you can do it. It's not difficult at all. In fact, after you've done it once, you'll scratch your head and wonder why on earth you hadn't done it sooner!
There are numerous ways to make homemade yogurt and if you read 10 different blogs about how to make homemade yogurt, you're likely to find 10 different variations. And that's because we've all found what works for us. There's really no right or wrong way to do it. And thankfully, homemade yogurt is pretty darn forgiving.


How to Make Homemade Yogurt
There are two main ways to make homemade yogurt – on the stovetop (and then incubated in the oven or in a cooler) or with a yogurt maker.
For me personally, I much prefer to use a yogurt maker rather than make it in a large pot, cook it on the stove, then keep it warm in my oven. Why? Well, first of all, I'd prefer to not tie up my oven for eight hours. Sure, you can do this overnight when it's less of an inconvenience. But sometimes I forget to prep everything before bed, so have to make a batch during daylight hours.
Secondly, with the yogurt maker I use, the Euro Cuisine, the yogurt is automatically portioned out into individual serving jars – the perfect size for breakfast. The lids have a cool date stamp, so I'll always remember how long ago I made the batch. The individual jars also prevent me from over-indulging on too much creamy yogurt goodness and make my homemade yogurt instantly portable – which is perfect if I'm grabbing breakfast on the go!
And lastly, I love my yogurt maker because after making probably over 100 batches of yogurt at home, I've never had one batch fail. Not one! The first couple of times I made yogurt on the stovetop I either boiled over my milk (massive mess) or burned milk to the bottom of the pot (which is not fun to clean). I always seem to be distracted in the kitchen, so the stovetop method isn't the best for me.
The digital yogurt maker I use costs about $40, but given how often I use it, I think it's money well spent!
Watch This Quick Video of My Homemade Yogurt Recipe
It's really easy to make this yogurt recipe at home, but it always helps to watch a quick video. I'll show you how I make it step-by-step. Give it a watch!
6 Basic Steps to Making Homemade Yogurt
To summarize the video above, there's 6 basic steps to making yogurt at home:
- Heat the milk to 180 degrees fahrenheit. This kills whatever unsavory microbes may be lurking in your milk and ensures you've got no remnant bacteria, pathogens, mold, or spores. When you create an environment for bacteria to multiple, you only want the good bacteria (which you introduce to the milk) to multiply. Heating the milk also creates a thicker yogurt by changing the protein structure.
- Cool the milk to 112-115 degrees fahrenheit. After you've made the milk inhospitable for the bad stuff, you want to make it hospitable for the good bacteria – your starter mix. Use the same instant read thermometer you used when heating your milk, to know when it's cooled to 112-115 degrees.
- Add your yogurt starter – the good bacteria. Pour out one cup of warm milk and stir in either a yogurt starter (I use Yogourmet) or 3 tablespoons of pre-made yogurt. For a good starter, look for lactic acid forming bacteria. At a minimum you wantLactobacillus bulgaricus and Streptococcus thermophilus. Other good bacteria include Lactobacillus acidophilus and Bifidobacterium lactis.
- Stir the yogurt starter with the rest of the milk. This spreads the good bacteria throughout all the milk.
- Pour the milk into jars and incubate for 7-9 hours. A consistent, luke-warm temperature is paradise for all your good bacteria and promotes their growth. The longer you incubate your yogurt the thicker and tangier it'll be. And after about 8 hours, you'll have delicious, healthy, thick and creamy yogurt.
- Place the jars in the fridge to cool and set.Cool the yogurt in the refrigerator for a couple of hours. As the yogurt cools it will get even thicker!
It should go without saying that starting with the best quality ingredients ensures you'll have the best quality end product. That means I always start with organic, grass-fed milk and use either a yogurt starter or a few tablespoons from one of my own previous batches.
You can definitely use supermarket-brand yogurt as a starter, but please read the ingredients carefully and look for live, active cultures. You don't want junky fillers, stabilizers and flavorings in the yogurt you'll use to propagate an entirely new batch.


A few other homemade yogurt making tips:
- You can use whole, 2% or skim milk. You can also use goat's milk. The more fat in your milk, the thicker the end product will be. In the video above, I used 2% milk which is why it wasn't super thick. In my red fruit salad with honeyed yogurt recipe I used whole milk and you can see it's much thicker.
- The first time you make homemade yogurt it will likely taste tangy, no matter how long you incubate it for. This is because your taste buds are used to overly sweetened, store bought yogurts. In time (and very quickly), your taste buds will adapt to this pure, homemade yogurt. But if you'd like to sweeten the yogurt, you can add 1-2 tablespoons of maple syrup at step #4 above. You can also add vanilla extract or a scraped vanilla bean. In fact, just the vanilla flavor alone will make it taste automatically sweeter.
- If you'd like to add fruit, do so after it's incubated. This ensures you don't upset the bacteria and prevent them from doing their thing, to create creamy homemade yogurt.
- The yogurt will stay fresh in the refrigerator for about ten days. Though I doubt you'll have any left once your family and friends learn you're making homemade yogurt!
- If you'd like to make dairy-free yogurt (i.e. coconut milk yogurt) it's a very similar process with some nuanced differences. But good news – I've already got a recipe for coconut yogurt with blood oranges and cacao nibs (so yum!). Just read through those instructions and you'll be good to go.
When I first started this website a few years ago I created a Gut Superfoods ebook and this recipe was included. As you know, I'm all about the gut health. And for now, you can still grab that ebook if you subscribe to this website (hint: the ebook also includes recipes for homemade sauerkraut, bone broth and pickled ginger) – all gut healing superfoods.
I'm not sure how long I'll keep that ebook around, so if you're interested, make sure to subscribe at the top or bottom of any page on this website.
More Delicious Recipes that Use Yogurt
- Strawberry Frozen Yogurt
- Red Fruit Salad with Honeyed Yogurt
- Peach Breakfast Smoothie
- Smoked Salmon Frittata
- Broccoli Salad (this might surprise you!)

How to Make Homemade Yogurt
Homemade yogurt is healthy and easy to make! This is my preferred method for perfect yogurt every time.
- 42 ounces organic milk, (whole, 2% or skim milk)
- 1 packet yogurt starter
-
Pour the milk into a large glass, microwave-safe bowl.
-
Heat the milk in the microwave on high for 10 minutes. Using an instant read thermometer, check the temperature of the milk. Keep heating in 1 to 2 minute increments until the temperature has reached 180 degrees fahrenheit.
-
Remove the milk and let it cool to 112-115 degrees fahrenheit. This process can be sped up by using an ice water bath.
-
Pour 1 cup of the milk into a small glass. Sprinkle the packet of yogurt starter on top and thoroughly mix it in.
-
Pour the small glass of milk back into the large bowl and stir to combine.
-
Fill the glass jars of the yogurt maker. Set the timer for 7-9 hours. The longer you leave the yogurt, the firmer and more tangy it will become. More beneficial bacteria are also produced with a longer incubation time.
-
Once the incubation is complete, remove the glass jars and refrigerate.
-
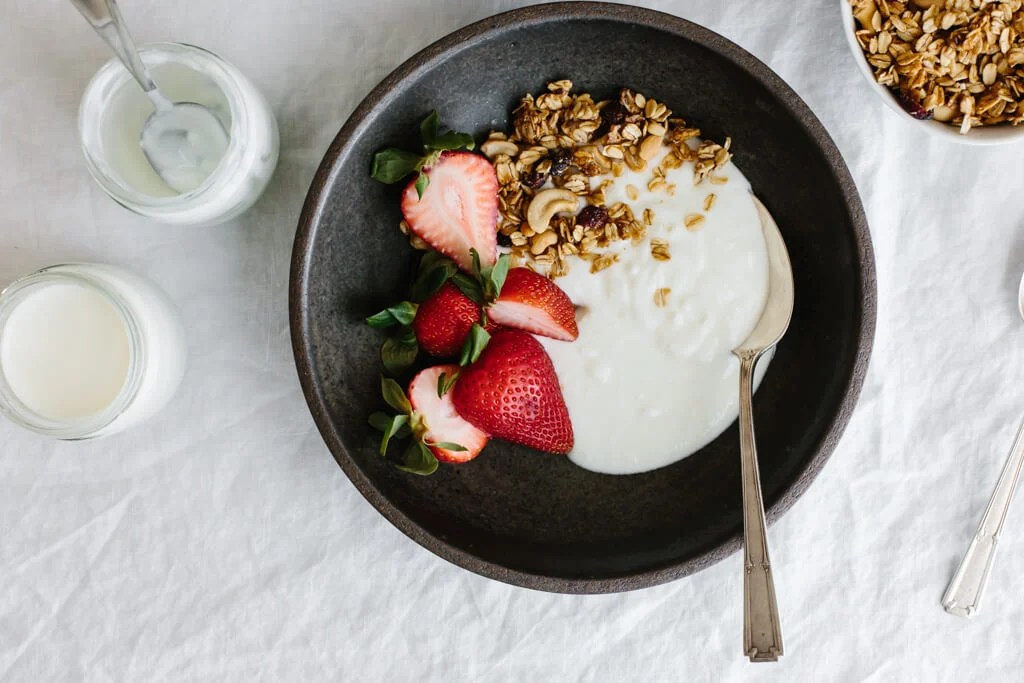
Before serving, you can add any toppings, such as fruit and granola.
Calories: 103 kcal , Carbohydrates: 8 g , Protein: 5 g , Fat: 5 g , Saturated Fat: 3 g , Cholesterol: 17 mg , Sodium: 73 mg , Potassium: 224 mg , Sugar: 8 g , Vitamin A: 275 IU , Calcium: 192 mg , Iron: 0.1 mg
©Downshiftology. Content and photographs are copyright protected. Sharing of this recipe is both encouraged and appreciated. Copying and/or pasting full recipes to any social media is strictly prohibited.
Leave a comment below and share a photo on Instagram. Tag @downshiftology and hashtag it #downshiftology.
Source: https://downshiftology.com/recipes/how-to-make-homemade-yogurt/
0 Response to "Easy Recipe for Making Yogurt From Scratch"
Post a Comment